What you’ll learn:
- The abdomen, thigh, and upper arm all work equally well for Zepbound® injections.
- Pens offer automatic delivery with hidden needles, while vials require manual preparation but deliver identical medication and results.
- Weekly site rotation and proper hold time prevent common issues like leakage and skin irritation, regardless of which type is used.
You probably know that Zepbound® can be highly effective for weight loss and that it comes as a weekly injection. When people are considering it, one of the biggest questions they have is about how this works. What is this actually going to feel like? Will I know what I’m doing? That hesitation is common, but with a little practice, it becomes easier and easier.
That first injection, though, definitely can feel like a big deal. But here’s the reality: thousands of people give themselves Zepbound® injections every week, and the process becomes surprisingly routine once the basics are understood.
Getting comfortable with injections comes down to three things: knowing where to inject, understanding the version you use—pen or vials—and following a consistent technique. It also helps to know what the studies say about injection sites and what to look out for if you have a reaction.
Questions about bruising, medication leaking out, or whether one spot works better than another are completely normal. This guide addresses all of that, plus the specific details that make weekly injections feel manageable instead of stressful.
What is Zepbound® and how is it administered?
People usually take Zepbound® to help them lose weight. It comes as a once-weekly injection that you give yourself. The active ingredient, tirzepatide, works by activating two hormone receptors involved in appetite and blood sugar regulation. In practical terms, that means it can lower appetite, slow digestion, and help support steady weight loss over time.
You inject Zepbound® just under the skin (this is called a subcutaneous injection). It’s not a shot into a muscle, and it’s not given into a vein. The needle is small, and the medication absorbs gradually throughout the week.
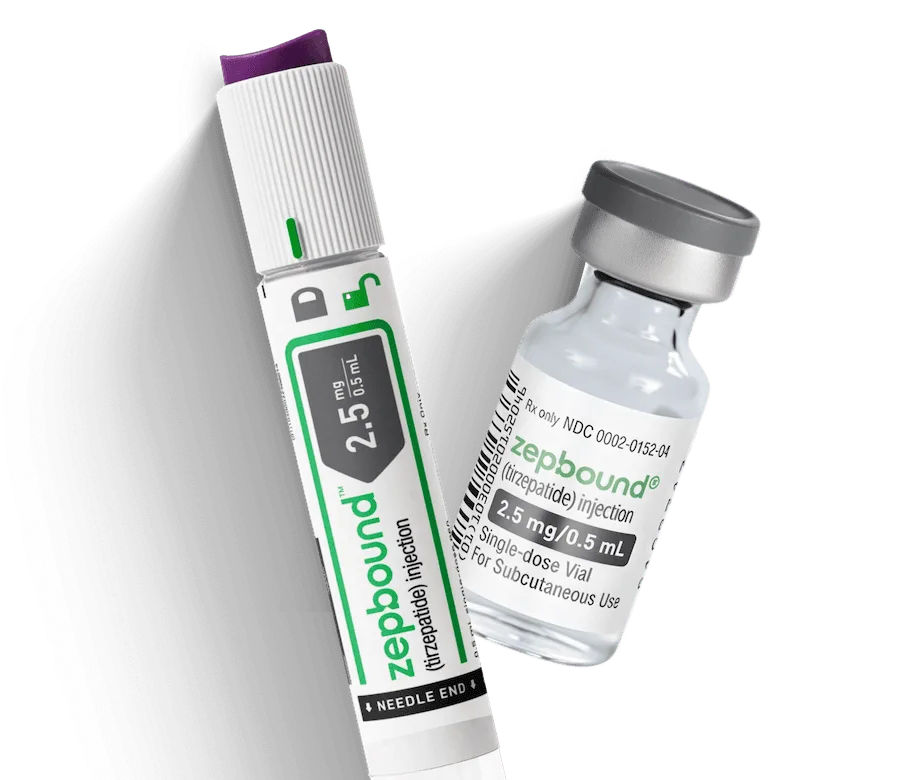
Zepbound® comes in two different forms, but the medication itself is exactly the same in both.
- With the auto-injector pen, the dose is pre-measured and delivered with the push of a button. The device inserts the needle, delivers the medication, and signals when it’s finished—and the needle stays hidden.
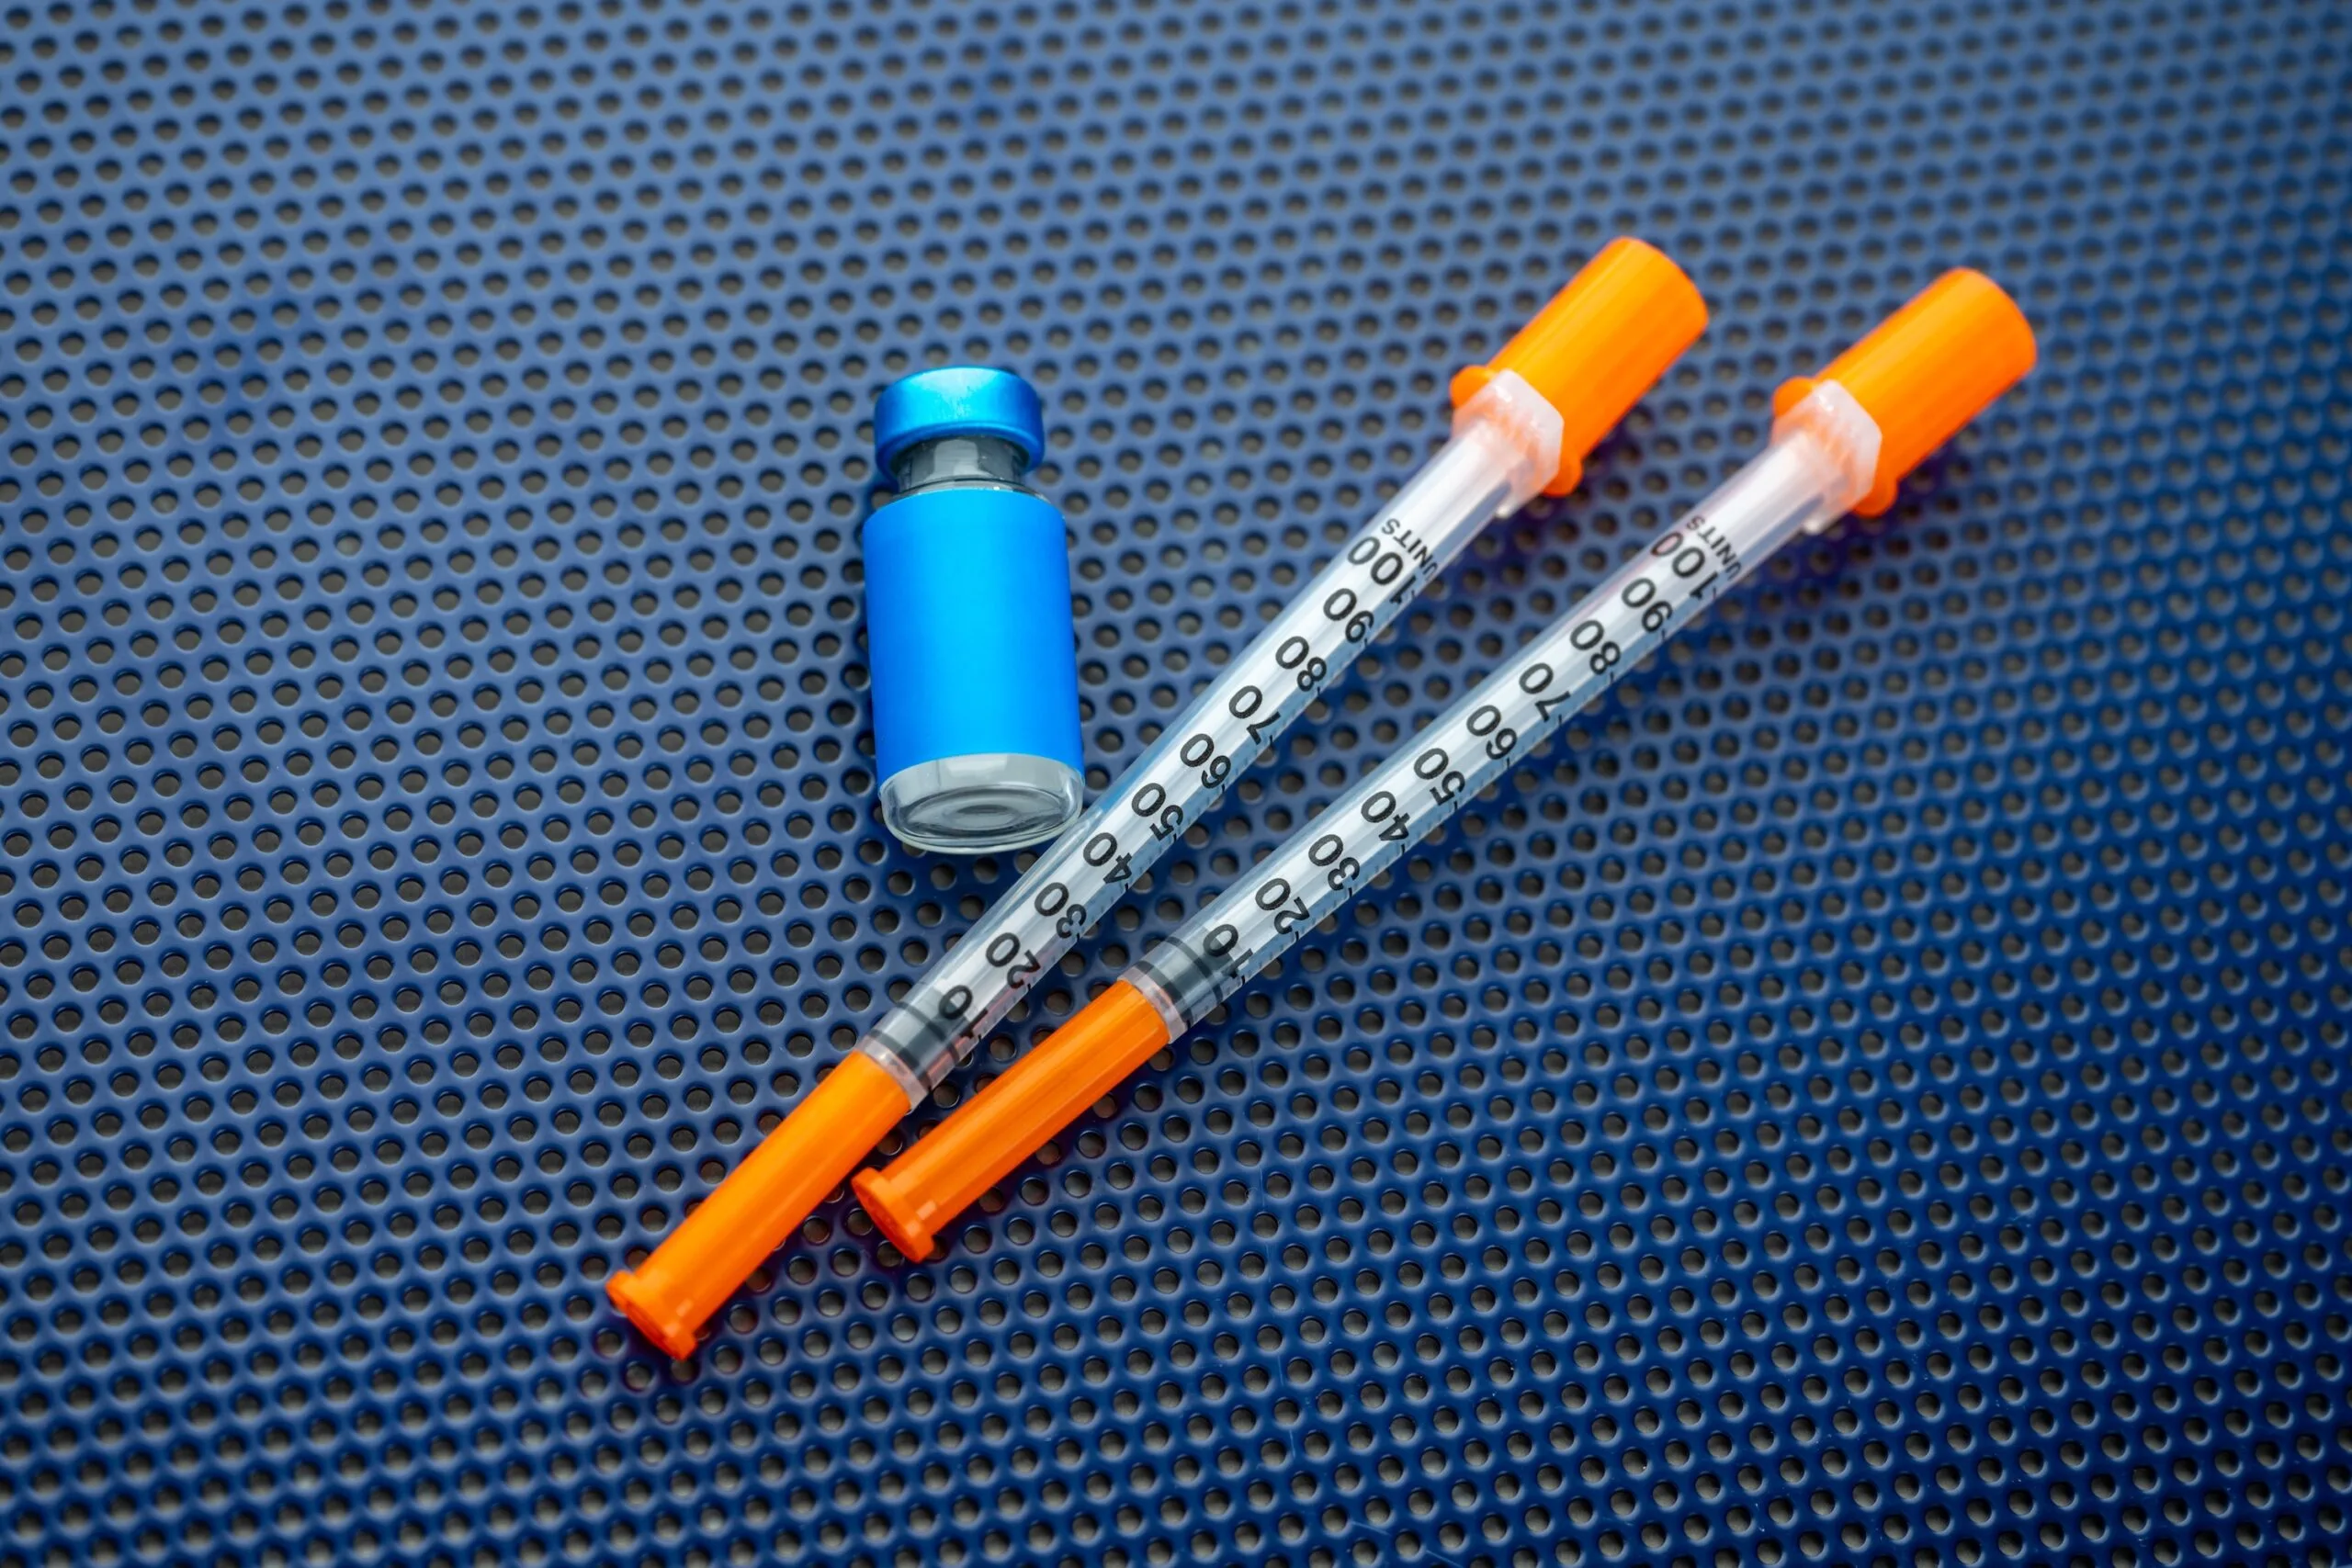
- With the single-dose vial, you draw the medication into a syringe before injecting it. It involves a few extra steps, but it uses standard injection techniques and is straightforward once you’ve been shown how to do it.
The active ingredient, dose strengths, and effectiveness are identical. The only difference is how you prepare and deliver the injection.
Why are there two different ways to take Zepbound® injections?
Mostly, it comes down to cost. Zepbound® is rarely covered by insurance, so most people end up paying out of pocket.
While the medication inside is the same, pricing can vary a lot depending on which type you use.
Prefilled pens still list at just over $1,000 per month and are available at many pharmacies. If you have insurance, the price is lower and it could be eligible for manufacturer discounts and savings cards.
Single-dose vials must be purchased through LillyDirect and are significantly less expensive. You can’t use insurance and will pay out of pocket.
That difference is what drives the decision for many people. If you’re comparing options, it helps to understand what Zepbound® costs right now and how insurance or savings programs may apply.
Pens simplify the process with automatic delivery and a hidden needle. Vials require drawing the medication into a syringe, but they can lower monthly costs for some people. Both methods work equally well medically—the choice usually comes down to budget, coverage, and personal comfort.
How to give yourself a Zepbound® injection
Whether you’re using a pen or vial, the core principle stays the same: tirzepatide gets delivered into subcutaneous fat tissue, where it gradually releases into the bloodstream. The medication performs identically regardless of format.
Access GLP-1 Weight Loss with Noom
Explore a wide range of prescription medications supported by Noom’s program.Microdose GLP-1rx
Noom GLP-1rx
Noom GLP-1rx Plus
Wegovy®
Ozempic®
Metformin
Zepbound®
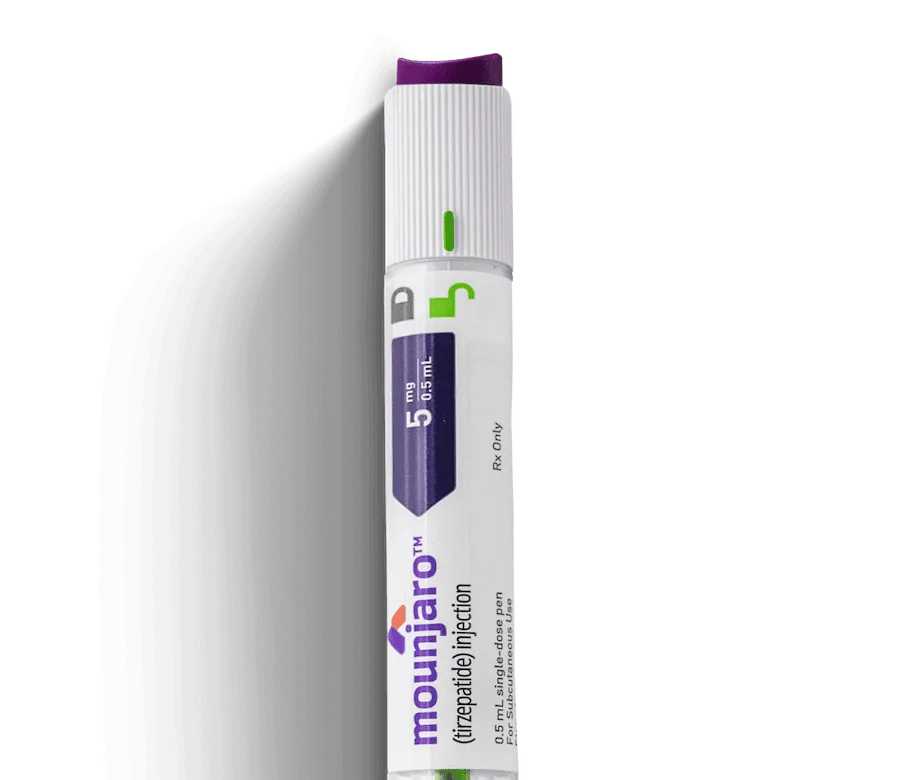
Mounjaro®
Liraglutide
- With pens, the process is largely automated. Position the device, press the activation button, hold steady, and wait for completion signals. The needle extends and retracts inside the pen housing—there’s nothing to see, and minimal manual control is needed.
- With vials, preparation takes a few extra steps. Drawing the dose, eliminating air bubbles, and manually controlling needle insertion require more active involvement. People familiar with insulin injections or similar medications typically adapt quickly. First-timers might need several attempts before the process feels smooth.
Here’s what happens for most people: the first injection feels like a major event. Maybe it takes several minutes to work up the courage to press the button or insert the needle. By the second or third week, that hesitation fades.
Building confidence comes from understanding the steps, practicing good technique, and recognizing that minor imperfections don’t ruin anything. A little blood at the injection site? Normal. Brief stinging sensation? Also normal. Taking longer than expected to finish? Completely fine.
The weekly routine becomes easier with repetition. And when questions arise—and they will—healthcare providers and pharmacists can provide personalized guidance based on individual circumstances.
Zepbound® injection instructions: Step by step
Following the same sequence each time reduces mistakes and builds muscle memory.
How to use the Zepbound® injection pen
Zepbound® pens arrive pre-filled with one weekly dose, factory-set to deliver the correct amount. There’s no measuring, no dose calculation, and no needle handling.
Zepbound® single-dose pens are available in six dosage strengths: 2.5 mg, 5 mg, 7.5 mg, 10 mg, 12.5 mg, and 15 mg. Each pen is clearly labeled with its dose strength.
Here’s how to inject a Zepbound® pen:
- Remove the pen from the refrigerator. Leave the gray base cap on until ready to inject. It’s not necessary to warm the pen to room temperature before use.
- Wash your hands with soap and water.
- Check the pen label to ensure it’s the correct medicine and dose, and that it hasn’t expired. Look through the window to verify the liquid appears clear and colorless to slightly yellow. Don’t use the pen if the liquid is cloudy, discolored, or has particles. Air bubbles are normal.
- Choose and clean the injection site. Select the abdomen or thigh (or have another person inject into the back of the upper arm). Clean the area with an alcohol swab and let it dry completely.
- Pull off the gray base cap while the pen is still locked. The cap comes straight off with steady pressure. The needle is hidden inside the pen—there’s no need to see or handle it.
- Place the clear base flat against the skin at the injection site.
- Unlock the pen by turning the lock ring.
- Press and hold the purple injection button for up to 10 seconds. The first click means the injection has started. Keep holding. The second click means the injection is complete. The injection is finished when the gray plunger is visible in the window. Even if you don’t feel any pain, if you hear 2 clicks, the injection is complete.
- Remove the pen from the skin. If there’s a drop of liquid or blood on the skin, this is normal. Press with a cotton ball or gauze. Do not rub the injection site.
- Dispose of the pen immediately. Place the used pen in an FDA-cleared sharps disposal container right away. These are single-use devices—do not try to reuse them.
The built-in safety features and automatic operation make them particularly appealing for people new to self-injection or anyone who feels uncomfortable handling visible needles. The main skill to develop is patience—holding the pen in place long enough for complete delivery takes longer than most people initially expect.
How to inject Zepbound® from a vial
Vials require more hands-on preparation than pens, but they’re not particularly difficult once the technique becomes familiar. Each vial contains one weekly dose in liquid form, but getting that medication into a syringe involves several distinct steps.
Zepbound® single-dose vials are available in the same six dosage strengths as pens: 2.5 mg, 5 mg, 7.5 mg, 10 mg, 12.5 mg, and 15 mg per 0.5 mL. Each vial is labeled with its specific dose strength. Confirm the vial matches the prescribed dose before drawing medication.
Gather supplies:
- 1 single-dose Zepbound® vial
- 1 syringe and 1 needle, supplied separately (At checkout, you can add syringes. They are 1 mL insulin syringes and the needle is already connected to the syringe, making it easier to use.)
- 1 alcohol swab
- Gauze
- 1 sharps container for disposal
Preparing to inject:
- Remove the vial from the refrigerator. Check the label to confirm the correct medicine and dose, and verify it has not expired. Ensure the medicine is not frozen, is colorless to slightly yellow, is not cloudy, and contains no particles.
- Wash your hands thoroughly with soap and water.
- Remove the plastic protective cap from the vial. Don’t remove the rubber stopper. Wipe the rubber stopper with an alcohol swab.
- Remove the outer wrapping from the syringe. Remove the needle shield by pulling it straight off.
- Hold the syringe with the needle pointing up. Pull the plunger down until the plunger tip reaches the 0.5 mL mark to draw air into the syringe.
- Insert the needle through the rubber stopper of the vial. Push the plunger all the way in to inject the air into the vial.
- Turn the vial and syringe upside down. Keep the needle tip in the liquid and slowly pull the plunger down until it goes slightly past the 0.5 mL mark.
- If air bubbles are present, gently tap the syringe to bring the bubbles to the top. Slowly push the plunger up until the plunger tip aligns exactly with the 0.5 mL mark.
- Pull the syringe straight out of the vial.
- Choose an injection site on the abdomen or thigh. Another person may inject into the back of the upper arm. Rotate injection sites with each dose. Don’t inject into skin that is thickened, pitted, lumpy, tender, bruised, scaly, hard, scarred, or damaged.
- Clean the chosen spot with an alcohol swab or wipe and allow it to dry.
- Insert the needle into the skin. Push the plunger down fully to inject the dose. Keep the needle in place for at least 5 seconds to ensure the full dose is delivered. Remove the needle from the skin. If bleeding occurs, press gently with gauze or an alcohol swab. Don’t rub. Don’t recap the needle.
- Immediately place the used syringe, needle, and vial into an FDA-cleared sharps disposal container, like an empty detergent bottle. Never reuse syringes or needles.
The vial method demands more active participation and careful attention to detail. Air bubble removal, proper needle insertion angle, and adequate hold time all require practice. But the medication works exactly the same as pen-delivered doses.
Zepbound® injection sites: Does it matter where you inject?
Zepbound® is injected under the skin (subcutaneously) into areas with enough fatty tissue for proper absorption. All approved sites are considered equally effective when used correctly.
You can inject into:
- Abdomen: Any area at least two inches away from the navel. Avoid scars, stretch marks, moles, or irritated skin.
- Thigh: The upper front area between the hip and knee.
- Upper arm: The outer back area between the shoulder and elbow. This site may require assistance.
In a study, researchers compared injections given in the abdomen, thigh, and upper arm and found similar peak blood levels across all three sites. In other words, the medication reached the bloodstream at comparable levels regardless of where it was injected.
Weight loss results depend on dose consistency, overall dietary patterns, physical activity levels, and individual metabolic response—not on the physical location where the needle goes in.
Some people wonder whether injecting near the stomach might somehow target belly fat or differently affect appetite. That’s not how subcutaneous medications function. After absorption, tirzepatide circulates throughout the entire body and acts on receptors in the brain and digestive system, not locally at the injection site.
Since effectiveness is the same across sites, choose the area that feels most comfortable and easiest to reach. Many people prefer the abdomen or thigh for self-injection.
Rotate injection spots each week to avoid injecting into the same exact location. Repeated use of one spot can cause lumps under the skin (lipohypertrophy), which may affect absorption and comfort. You can rotate within one area or alternate between two.
Both pens and vials can be used in any approved injection site. The choice comes down to comfort and convenience.
Zepbound® injection site: Stomach (abdomen)
The abdominal area ranks as the most popular injection site for good reason. It’s visible, accessible without contortion, and offers substantial surface area for rotating injection spots week to week.
Proper placement: Any location at least two inches from the belly button in any direction works. Stay away from visible veins, moles, surgical scars, stretch marks, or any area that looks red, bruised, or feels tender.
Advantages:
- Clear visibility makes pen or syringe positioning straightforward. Watching what’s happening during injection builds confidence, especially during the learning phase.
- Generous space for rotation. The abdomen provides more usable area than other sites, making it easier to avoid repeating spots.
- Healthcare providers commonly recommend starting here. The combination of easy access and ample space makes the abdomen a logical first choice for most people.
Drawbacks:
- Sensitivity varies widely. People with less subcutaneous fat around the midsection sometimes find abdominal injections more uncomfortable than thigh injections. Individual pain tolerance plays a major role.
- First-time discomfort isn’t unusual. Even people who eventually prefer the abdomen sometimes notice more sensation during early injections. This often improves with practice and familiarity.
Does injection into the stomach hurt more?
Not universally. This belief persists, but pain perception depends heavily on individual anatomy, fat distribution, and technique quality. Plenty of people feel virtually nothing when injecting abdominally. Testing different spots within the abdominal area or trying the thigh for comparison can help identify what works best personally.
One important clarification: injecting into the abdominal area doesn’t increase gastrointestinal side effects. The medication absorbs into circulation from subcutaneous tissue—it doesn’t go directly into the stomach. Nausea and other digestive effects result from how tirzepatide acts throughout the body, not from local effects at the injection site.
Zepbound® injection site: Thigh
The front of the thigh provides a reliable alternative to abdominal injection and works particularly well for people who want to rotate between different body regions.
Correct placement: The upper front section of the thigh, roughly midway between the knee and the hip, contains suitable fatty tissue. Avoid the inner thigh where nerves and blood vessels cluster more densely, and steer clear of bruised, scarred, or irritated areas.
Advantages:
- Reduced sensitivity for many people. Those carrying more subcutaneous fat on their thighs frequently find this area more comfortable than the abdomen.
- Easy rotation between sides. Alternating left and right thigh, or switching between thigh and abdomen weekly, distributes injection stress across more skin territory.
- Accessible positioning in most situations. The thigh can be reached easily while standing or sitting, and both pens and syringes can be maneuvered comfortably.
Drawbacks:
- Positioning feels awkward for some people. Depending on sitting position and body proportions, achieving the right angle and maintaining stability during injection might require adjustment.
- Visibility challenges in certain positions. When seated with legs bent, seeing the thigh clearly can be harder than seeing the abdomen. This matters less with automatic pens but can affect syringe users who want to watch the injection process.
Does the thigh work as well as the abdomen?
Absolutely. Zepbound®‘s prescribing information explicitly states that the abdomen, thigh, and upper arm all provide equivalent medication delivery. Absorption rates and treatment effectiveness don’t vary by site selection.
The thigh suits people seeking variety in their rotation pattern or those who find the abdomen less comfortable. Some people establish a pattern—abdomen one week, thigh the next—which gives each area two weeks of recovery time between injections.
Zepbound® injection site: Upper arm
The upper arm qualifies as an approved site, but it comes with one significant practical challenge: reaching the correct area while also maintaining visibility and control during injection proves difficult for most people working alone.
Appropriate location: The outer back portion of the upper arm, in the fatty area between the shoulder and the elbow. This region should have enough subcutaneous tissue to accommodate the injection. Avoid bony areas, visible veins, scars, or any irritated skin.
Advantages:
- Provides a third rotation option. When the abdomen and thigh have been used consistently, the upper arm offers fresh skin territory.
- Potentially less sensitive for some individuals. Like the thigh, the upper arm sometimes feels more comfortable than the abdominal area, depending on personal anatomy.
Drawbacks:
- Self-injection is extremely awkward. Reaching behind the arm to position a pen or syringe while maintaining a proper angle and seeing what’s happening requires contortions most people can’t manage comfortably.
- Usually requires help from someone else. A family member, partner, or caregiver can easily access the upper arm and see the injection process clearly. Solo injectors find this site impractical.
When does the upper arm make sense?
With assistance available and a desire to rotate through all approved sites, the upper arm works perfectly well. It’s also useful if temporary issues with the abdomen or thigh make those areas unavailable—post-surgical healing, skin conditions, or injuries might necessitate using the arm for a few weeks.
For people injecting independently, focusing on the abdomen and thigh makes more sense. There’s no requirement to use all three approved sites. Rotating competently within one or two areas accomplishes the same goals without unnecessary difficulty.
Best injection site for Zepbound®: Is there one?
Here’s the straightforward answer: no single injection site delivers superior results. Whether the medication goes into the abdomen, thigh, or upper arm, it all works the same way.
Given that medical outcomes don’t vary by site, what should guide the decision?
The optimal site is whichever one satisfies three practical criteria:
- Easy access – Can the area be reached without awkward positioning? Is it possible to see the pen or syringe clearly during injection?
- Comfortable sensation – Does one location feel noticeably better than others, or is the experience basically the same across all sites?
- Sustainable routine – Will this site remain practical for weekly use over months? Is rotation within this area straightforward?
Most people who self-inject find the abdomen or thigh meets all three standards. These sites are reachable, visible, and offer plenty of room for rotation. The upper arm works equally well medically, but typically requires assistance for practical reasons.
Whichever site feels most comfortable, using the exact same spot every single week creates problems. Lipohypertrophy—the buildup of fatty lumps under repeatedly injected skin—can develop and interfere with medication absorption. The lumps themselves can become uncomfortable and complicate future injections. Consistent rotation prevents this entirely.
Rotation doesn’t demand complexity. Some people choose one area—say, the abdomen—and simply shift a couple of inches in different directions each week: left side, right side, upper area, lower area. Others prefer alternating between two sites: abdomen one week, thigh the next. Both strategies work fine as long as the same precise spot isn’t getting hit week after week.
Does choosing a pen versus a vial affect where you inject?
No. Both work equally well in all approved injection sites. The choice between a pen and a vial depends on comfort, preparation preference, and availability—not on effectiveness or site selection.
The best injection site comes down to what feels easiest and most comfortable. The abdomen is a common starting point. The thigh is another good option. If you’re unsure, your healthcare provider can help you decide.
Managing Zepbound® injection site issues
Minor reactions at injection sites can happen and affect about 6 to 8% of people using Zepbound. There’s no info on whether the vial and syringe cause more or fewer reactions. Most issues resolve within a couple of days and don’t require medical intervention. Knowing which reactions fall within the normal range versus which deserve professional attention helps prevent unnecessary worry.
Typical, expected reactions:
- Brief stinging or burning. A momentary warm or stinging sensation during or immediately after injection is common with both pens and vials. This usually fades within seconds. Allowing medication to reach room temperature before use and confirming skin is completely dry after alcohol application can minimize discomfort.
- Redness or bruising at the site. Some degree of redness, tenderness, or light bruising happens occasionally, especially if a small blood vessel was disrupted during needle insertion. These marks typically disappear within one to two days. Consistent site rotation helps reduce bruising frequency over time.
- Small lumps beneath the skin. A minor lump may occasionally form where medication was injected. This usually represents a normal tissue response as the medication absorbs. Repeatedly finding lumps in frequently used areas might indicate lipohypertrophy—fatty tissue buildup from inadequate rotation. More consistent site variation should prevent this.
- Tiny blood or fluid drops. Seeing a small amount of blood after needle removal is normal. Light pressure with gauze or a cotton ball addresses this easily. If medication leaks onto the skin surface, that’s a different concern addressed in detail in the next section.
When to reach out to a healthcare provider:
While minor reactions are common and harmless, certain symptoms warrant professional evaluation:
- Redness, swelling, or pain that expands beyond the immediate injection area, worsens over time, or persists beyond several days.
- Infection signs include warmth surrounding the site, pus, fever, or increasing tenderness.
- Severe itching, hives, or rash extending well beyond the injection location.
- Persistent lumps or firm areas under the skin that don’t resolve, particularly if they interfere with subsequent injections.
- If you experience any signs of a severe allergic reaction, including breathing difficulty, facial or throat swelling, rapid heartbeat, or dizziness, get immediate medical attention.
Most people experience minimal issues beyond occasional minor bruising or brief stinging. But when something feels genuinely concerning rather than just mildly uncomfortable, contacting a healthcare provider makes sense. They can determine whether what’s happening falls within normal parameters or requires attention.
What to do if Zepbound® leaked out of the injection site
Noticing liquid on the skin after an injection can be alarming, but it doesn’t automatically mean something went wrong. Understanding why leakage occurs and how to respond helps prevent panic.
Common causes of leakage:
Premature pen or needle removal is the most frequent reason. Zepbound® requires several seconds to deliver fully under the skin. Pens need to stay pressed firmly against skin until complete—usually signaled by a second click or the plunger stopping visible movement.
Syringes should remain inserted for several seconds after the plunger reaches the bottom. Pulling away too quickly can cause medication to leak back through the needle track before the subcutaneous tissue absorbs it.
Impact on dose effectiveness:
A tiny droplet on the skin surface doesn’t necessarily indicate significant medication loss. But if a larger quantity leaked out—enough to form a noticeable puddle or if medication visibly spurted from the site—there’s a possibility the dose was incomplete.
What to avoid:
- Don’t give a second injection. Re-injecting could result in too much medication, substantially increasing side effect risk, including nausea, vomiting, or dangerously low blood sugar.
- Don’t double the following week’s dose. The next scheduled injection should happen as planned at the regular dose. Making unauthorized dosage adjustments can cause significant problems.
Here’s what you can do:
- Note what happened for future reference. For the next injection, focus on improved technique—press the pen more firmly, hold it longer, or count to at least five after fully depressing a syringe plunger.
- Monitor symptoms. If most of the dose was delivered, effectiveness shouldn’t noticeably decrease for that week. If medication clearly didn’t enter the body, side effects might be milder that week, and appetite could return sooner than typical.
- Contact healthcare provider if uncertain. When leakage happens repeatedly or when it’s unclear whether adequate medication was delivered, professional guidance makes sense. Providers can help troubleshoot the technique or determine whether any adjustments are needed.
Dealing with malfunctioning devices:
If a pen fails to work properly, the plunger doesn’t advance, medication appears cloudy, or the vial looks damaged, don’t attempt repairs or use it in any way. Dispose of the faulty device safely and use a replacement. Contact the manufacturer or your pharmacy at 1-800-LillyRx (1-800-545-5979) to report the issue and request a replacement.
One imperfect injection isn’t a disaster. The focus should be on refining technique moving forward, rather than obsessing over a single week’s dose.
FAQs about Zepbound® injections and injection sites
Even with comprehensive instructions, specific questions arise—particularly around comfort, timing, and handling unexpected situations. Here are detailed answers to the most frequently asked questions.
Does the Zepbound® injection hurt?
Most people characterize Zepbound® injections as “relatively painless.” The typical sensation is brief pressure, a quick pinch, or mild sting lasting only a moment or two.
- Comparison to other injections: Zepbound® pens use short, extremely thin needles designed specifically for subcutaneous delivery. This generally feels less uncomfortable than intramuscular injections like flu vaccines, which penetrate deeper into muscle tissue. Many people liken the experience to insulin injections or other GLP-1 medications—quick and minimally noticeable once the technique becomes familiar.
- Is there a pain difference between pens and vials? Personal experiences vary. Some people find pens more comfortable because automatic delivery happens quickly without requiring manual needle control. Others notice no difference whatsoever. Needle gauge and insertion depth are comparable for both formats, so pain perception tends to reflect individual sensitivity and technique quality rather than the format itself.
Is any Zepbound® injection site best for weight loss?
No. Zero evidence suggests that injecting Zepbound® into one body area versus another influences weight loss outcomes.
The best injection site for weight loss is simply whichever one gets used consistently and comfortably every single week.
Is the best Zepbound® injection site different if you use a vial?
No. The same three approved sites—abdomen, thigh, and upper arm—apply to both pens and vials. Format doesn’t change where medication should be administered.
That said, some practical considerations might influence site preference:
- Visibility matters more with syringes. Being able to see the needle and syringe clearly during manual injection is important, especially for people still learning. The abdomen tends to be more visible than the thigh or upper arm.
- Stability requirements. Holding a syringe steady while manually inserting and injecting requires more control than using an automatic pen. Some people find the abdomen easier to access and stabilize.
- Experience level. People experienced with manual injections (like long-term insulin users) might feel equally comfortable with any site. Those newer to the process might prefer starting with the most accessible area. The medication performs identically regardless of site or format. Site selection ultimately comes down to what’s comfortable, accessible, and easy to rotate.
Can I switch between pens and vials?
Yes, switching between pens and vials is easy since the dose amounts are the same.
Reasons for switching:
- Supply availability. Pens sometimes face backorders due to high demand, prompting temporary switches to vials.
- Cost considerations. Vials carry lower out-of-pocket costs if your insurance doesn’t cover Zebound.
- Personal preference. Some people prefer the control that manual injection provides, while others value pen convenience.
Important considerations when switching:
- Dosage must remain consistent. Both pens and vials come in matching dose strengths, but confirming the correct dose is crucial when switching formats. Double-check with the pharmacist or healthcare provider.
- Technique differences require adjustment. Moving from pens to vials means learning to draw medication, eliminate air bubbles, and manually inject. Moving from vials to pens means adapting to automatic delivery systems.
There’s no medical reason preventing alternation between pens and vials when necessary. The medication is identical, and effectiveness remains constant. Just ensure the transition is coordinated properly to prevent dosing errors.
Can I use the same injection site every week?
Not the exact same spot, no. Using the same general area—like the abdomen—every week is perfectly fine, but the specific injection location should shift by at least an inch or two each time.
Why rotation is important:
Repeatedly injecting the exact same spot increases several risks:
- Lipohypertrophy – Fatty tissue accumulation that creates lumps beneath the skin. This can disrupt medication absorption and make subsequent injections uncomfortable.
- Persistent skin irritation – Redness, tenderness, or sensitivity that doesn’t fully resolve between doses.
- Increased bruising – Higher likelihood of repeatedly hitting the same small blood vessels.
Effective rotation strategies:
- Select one or two body areas to focus on (abdomen, thigh, or both).
- Move at least an inch away from the previous week’s injection spot.
- Alternate sides (left and right) or positions (upper and lower, inner and outer).
Some people follow visual patterns—upper left abdomen, lower right abdomen, upper right, lower left—to track rotation. Others simply choose spots that look and feel unused. Neither approach is superior as long as the same precise location isn’t used consecutively.
What if I inject Zepbound® incorrectly?
The appropriate response depends on what went wrong.
- If the pen or needle was removed too early and medication leaked: Don’t re-inject. Wait until the next scheduled dose and focus on holding the pen or needle in place longer next time. Minor leakage usually doesn’t significantly impact effectiveness, but recurring issues should be discussed with a healthcare provider.
- If the pen didn’t click, the plunger didn’t advance, or the injection seemed to fail: Don’t attempt to fix the device or use it again. Dispose of it safely and use a fresh pen or vial. Contact the manufacturer or pharmacy to report the malfunction. If it’s unclear whether any medication was delivered, reach out to a healthcare provider for guidance.
- If the injection went into an incorrect area (like muscle or an unapproved site): Zepbound® is intended for subcutaneous use only and should be injected into the abdomen, thigh, or upper arm as directed in the prescribing information. If you believe the injection was given incorrectly or you notice unusual symptoms, contact your healthcare provider for guidance.
- If the dose was given on the wrong day: If it’s a day or two after your normal day, just resume normal weekly timing from there. If several days off schedule, check with a healthcare provider to confirm whether to adjust, continue as planned, or to select a different dose.
Injection mistakes can happen. The key is avoiding panic and not attempting self-correction through extra doses. When uncertainty exists, contacting a healthcare provider or pharmacist is always the safest approach.
Does the injection site affect side effects like nausea?
No. Where you inject Zepbound® doesn’t change your risk of side effects like nausea, vomiting, diarrhea, or fatigue. Once the medication is injected under the skin, it enters your bloodstream and works throughout your entire body. It doesn’t stay near the injection site. If side effects become hard to manage, talk to your healthcare provider about adjusting your dose or schedule, since changing injection sites will not reduce systemic side effects.
Reviews from real Noom users
Desirea N. — Real Noom user

“My favorite parts of Noom are the care team and other Noomers. Sharing and getting help made me feel like I wasn’t doing it alone. That support made all the difference.”
Desirea N. — Real Noom user
Matthew M. — Real Noom user

“Noom has taught me that every day is a new chance to make better, healthier choices. It's taught me how to stop overeating.’’
Matthew M. — Real Noom user
Lila M. — Real Noom user

“Clinicians who understand how supportive medication can be is one of the best parts of Noom! I was convinced I wouldn’t have success but I’m down 11 pounds in two months.’’
Lila M. — Real Noom user
Steve M. — Real Noom user
“Noom provided me with the medication which I could not get through Medicare. I have learned the tricks to better eating and life in general.”
Steve M. – Real Noom user
Daisy R. — Real Noom user
‘’Noom has changed my life and I’m so thankful, I feel great, have more energy and am no longer prediabetic.”
Daisy R. – Real Noom user
Sarah R. — Real Noom user

“All of the Noom providers that I’ve met with have been exceptional and prescribed medications that are appropriate for my situation and health.”
Sarah R. – Real Noom user
Madison S. — Real Noom user
“Noom made the process so simple and now I feel full, free from diet obsession, and at ease in my body again.”
Madison S. – Real Noom user
Sonday K. — Real Noom user
“My doctor recommended Noom after I was frustrated trying to lose weight. The lessons helped change my relationship with food. My body feels lighter & energized.”
Sonday K. – Real Noom user
Cam K. — Real Noom user
“I built healthy habits with coaching and lessons that make me confident I can maintain my weight loss long term.”
Cam K. – Real Noom user
Laura TR. — Real Noom user
“With the right medication through Noom, hunger and sugar cravings finally quieted and I have the tools to break the cycle.”
Laura TR. – Real Noom user
Jessica S. — Real Noom user

“Cravings and food noise are gone, I finally feel confident in the healthy habits I’ve built to last with Noom.”
Jessica S. – Real Noom user
The bottom line: Injecting correctly can help minimize reactions
Giving yourself a Zepbound® injection can feel intimidating at first, but it becomes easier with understanding and repetition. Once you know where you like to inject, how your delivery method works, and what normal reactions look like, the process shifts from stressful to routine.
Pens and vials may look different, but the medication works the same either way—and no injection site offers better results than another. What matters most is consistency, proper technique, and choosing an approach that feels manageable week after week. With proper technique and routine, Zepbound® can become a smooth, sustainable part of your weekly care plan.
If you’re wondering if Zepbound or another GLP-1 medication is right for you, see if you qualify for Noom Med. You’ll be connected with a clinician who can help determine the right medication for you and prescribe it if needed.
Your subscription to Noom Med includes our custom GLP-1 Companion that will provide you with the tools and support you need throughout your medication journey. It includes practical tools and short lessons to help you stay on top of protein and nutrition, strength-focused workouts to support muscle, and clear guidance for managing side effects.
Everything connects with Noom’s food logging and coaching, so you’re building realistic habits alongside your GLP-1 medication—not trying to figure it all out on your own.
Editorial standards
At Noom, we’re committed to providing health information that’s grounded in reliable science and expert review. Our content is created with the support of qualified professionals and based on well-established research from trusted medical and scientific organizations. Learn more about the experts behind our content on our Health Expert Team page.